How to Screen Record on iPhone and iPad: Complete Guide
Screen recording on iPhone and iPad takes just three taps once you know where to look. The feature, built into iOS since version 11, lets you capture anything happening on your device’s display — from app tutorials to gaming highlights.
Here’s everything you need to know, starting with the quickest method and covering advanced techniques for power users.
Quick Start: Record Your Screen in 30 Seconds
Most iPhone users can start recording immediately:
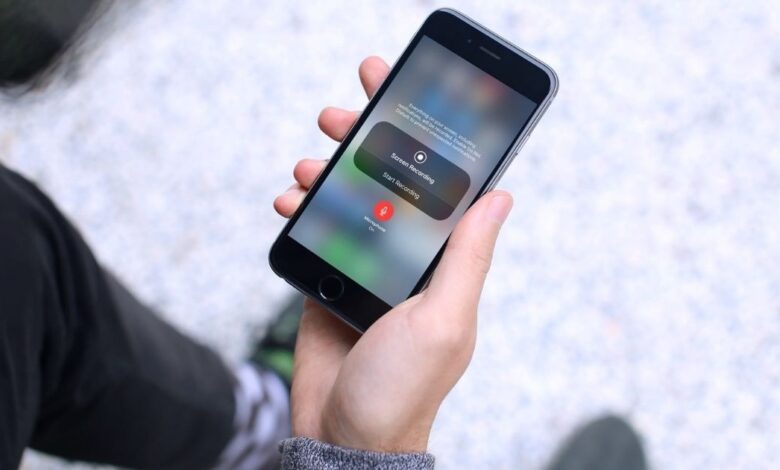
- Swipe down from the top-right corner (newer iPhones) or up from the bottom (older models)
- Tap the record button (circle with a dot inside)
- Wait three seconds, then start whatever you want to capture
Don’t see the record button? You’ll need to add it first — we’ll cover that next.
Setting Up Screen Recording
Apple hides the screen recording feature until you manually enable it. This one-time setup takes about a minute:
Open Settings, then tap Control Center. Look for “Customize Controls” and find Screen Recording in the list. Tap the green plus sign next to it.
That’s it. The record button now appears in your Control Center alongside flashlight, calculator, and other quick tools.
Different iPhones, Different Gestures
How you access Control Center depends on your iPhone model:
- iPhone X and newer: Swipe down from the top-right corner
- iPhone 8 and older: Swipe up from the bottom edge
- iPad: Usually swipe down from top-right, but varies by model and iOS version
iPod touch users follow the same pattern as older iPhones.
Recording with Sound
By default, screen recordings capture video without audio. To include sound from your microphone:
Press and hold the record button instead of just tapping it. A menu appears with a microphone option — toggle it on, then start recording.
Important limitation: iPhones can’t record system audio (music, game sounds, video audio) directly. You’ll only capture whatever your microphone picks up, like your voice providing commentary.
Why No System Audio?
Apple restricts system audio recording for privacy and copyright reasons. Apps like Netflix or Spotify actively block this to protect content. If you need system audio, you’ll need third-party apps or workarounds.
Finding Your Recordings
All screen recordings save automatically to your Photos app. Look in Recent photos or search “screen recording” to find them quickly.
Videos appear as MP4 files and include the date, time, and duration in their details. File sizes vary dramatically based on what you’re recording — static screens create smaller files than action-packed games.
When Screen Recording Doesn’t Work
Several common issues prevent screen recording from functioning properly.
Grayed-Out Button
If the record button appears faded and won’t respond to taps, restrictions are likely blocking the feature.
Navigate to Settings > Screen Time > Content & Privacy Restrictions. Look for Content Restrictions, then scroll down to Game Center. Make sure Screen Recording shows “Allow.”
This happens frequently on devices managed by parents, schools, or employers.
Recording Fails to Save
You’ll see error messages like “Screen Recording failed to save” when your device lacks storage space or encounters software conflicts.
Check available storage in Settings > General > iPhone Storage. Delete photos, videos, or unused apps if you’re running low. As a rule, keep at least 1GB free for reliable recording.
Software conflicts require more troubleshooting. Restart your device first — this fixes most temporary glitches. If problems persist, try recording in different apps to isolate the issue.
Low Power Mode Interference
When your battery drops below 20%, iOS automatically enables Low Power Mode, which can disable screen recording to preserve energy.
Either charge your device or manually disable Low Power Mode in Settings > Battery.
App-Specific Blocks
Some apps actively prevent screen recording for security or copyright reasons:
- Banking apps (Chase, Bank of America, Wells Fargo)
- Streaming services (Netflix, Hulu, Disney+)
- Video calling apps (may show black screens or notify participants)
- Certain games and social media apps
These restrictions exist at the app level — nothing you can do will override them on unmodified devices.
Advanced Recording Techniques
Live Streaming
Recent iOS versions let you broadcast your screen directly to supported apps instead of saving local recordings.
Hold down the record button, and you’ll see options for apps like Instagram, Twitch, or Zoom (if installed). Select one to start live streaming immediately.
This feature works best with strong internet connections. Poor Wi-Fi or cellular service causes choppy streams or disconnections.
Longer Recordings
iOS doesn’t impose strict time limits on screen recordings, but practical constraints exist.
Battery life becomes the main limiting factor — recording drains power quickly, especially with microphone enabled. Storage space matters too, as hour-long recordings can exceed several gigabytes.
For extended sessions, plug in your device and ensure ample free storage beforehand.
Multiple Device Recording
You can’t simultaneously record screens on multiple devices with your Apple ID, but you can record one device’s screen while using another normally.
This proves useful for creating tutorials showing iPhone and iPad interactions side by side.
Privacy and Legal Considerations
Screen recording everything you see raises important privacy questions.
Recording private conversations, even your own, may violate local laws depending on your location. Some states require all parties’ consent for recording phone calls or video chats.
Similarly, recording copyrighted content — movies, TV shows, music — likely infringes on creators’ rights, even for personal use.
When sharing screen recordings publicly, scrub them for sensitive information like passwords, personal messages, or private photos that might appear in notifications.
Third-Party Alternatives
While Apple’s built-in recorder handles most needs well, specialized apps offer additional features.
Popular options include DU Recorder, Record It!, and TechSmith Capture. These apps often provide better editing tools, system audio recording (through workarounds), and enhanced sharing options.
However, they typically require more permissions and may include ads or subscription fees. For basic recording needs, stick with Apple’s free solution.
Editing Your Recordings
The Photos app includes basic editing tools for trimming unwanted sections from your recordings.
Open any screen recording, tap Edit, then drag the yellow handles to select which portions to keep. This works well for removing dead time at the beginning or end.
For more sophisticated editing — adding text, arrows, or multiple video layers — consider apps like iMovie (free), LumaFusion (paid), or Adobe Premiere Rush (subscription).
Performance Tips
Screen recording demands significant processing power and battery life. A few adjustments can improve results:
Close unnecessary background apps before starting long recordings. Enable Do Not Disturb to prevent notification interruptions. Keep your device charged, as Low Power Mode can interfere with recording functionality.
For smoother recordings, avoid rapid scrolling or quick gestures that can appear choppy in the final video.
Storage Management
Screen recordings consume storage quickly — a 10-minute tutorial might use 100-500MB depending on content complexity.
Review and delete unnecessary recordings regularly. Consider uploading important videos to cloud storage services like iCloud, Google Drive, or Dropbox, then removing local copies to free space.
You can also reduce file sizes by trimming recordings to remove unnecessary portions before sharing or archiving.
Sharing Options
Once you’ve captured your screen recording, multiple sharing methods exist.
AirDrop works well for sending to nearby Apple devices. For broader sharing, use Messages, Mail, or direct uploads to social platforms like YouTube, Instagram, or TikTok.
Large files may require compression or cloud links rather than direct attachment, especially when emailing or messaging.
Professional users often prefer platforms like Vimeo or Wistia for higher-quality playback and better viewer analytics.